Astro 架站筆記(一):基礎設定、搭配 React + Tailwind
由於我目前使用的 Blog 框架 Hexo 已經是個有點歷史的框架了,更新的並不頻繁,並且當我想嘗試客製化一些前端的小功能時,發現 Hexo 其實彈性相當低。
因此在搜索了一陣子之後,找到了 Astro 這個近幾年蠻紅的新框架,也是所謂的 SSG(Static Site Generator),不但可以搭配 React 來開發,還標榜 Fast by default!於是乎我就來開始研究這個框架。
Astro 是一個 Content-driven 的 Framework (Astro - Why Astro),相較於主流 Frameworks(如 React, Vue)的 SPA 架構需要在第一次瀏覽時載入幾乎整個網站的 HTML + JavaScript;而 Astro 的目標是盡可能提供單純的 HTML,並透過 Islands Architecture 來最小化 Client-Side 執行 JavaScript,因此載入的 Bundle 小、前端執行的程式碼短,便造就載入速度快速。
接下來的內容便來記錄一些安裝的流程。
基本安裝
-
npm init -
npm install astro -
Git Init 後,記得建立
.gitignore,並加上node_modules/和.astro(儲存 Astro Cache 的資料夾) -
package.json的 scripts 改成"scripts": { "dev": "astro dev", "build": "astro build", "preview": "astro preview" }, -
若在 VSCode 中,可安裝 Astro 這個 Extension
-
在根目錄中建立
public資料夾,放入favicon.svg,並在index.astro中的<head>內加入<link rel="icon" type="image/svg+xml" href="/favicon.svg" />就能在瀏覽器中看到 Logo。基本上靜態檔案也都放在public的資料夾內 -
新建
src/pages並在裡面加上index.astro的入口頁面,.astro是 Astro 自己的格式,本體是 HTML Markup,並且能寫 JavaScript,甚至是 React 等前端框架的程式碼--- console.log('Terminal testing'); --- <html> <head> <link rel="icon" type="image/svg+xml" href="/favicon.svg" /> </head> <body> <h1>Hello, World</h1> </body> <style> h1 { color: orange; } </style> </html>我們可以寫一個簡單的頁面測試,首先,最上方用
---包覆起來的區塊稱作 frontmatter,可以在.astro檔案中寫 JavaScript 或 TypeScript 的程式碼,這裡簡單測試能否在 Astro 的 Terminal 印出Terminal testing。再來,可以看看 HTML Markup 中的內容,例如 Logo 是否有載入成功、Style 能否順利渲染
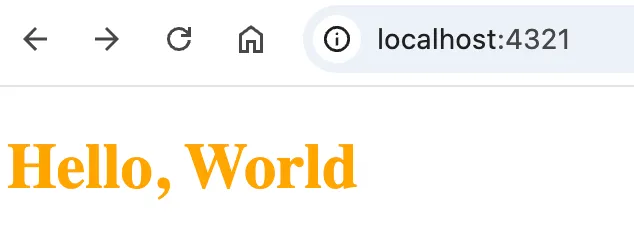
成功渲染 Hello, World
加入 TypeScript, React
參照 Astro - Manual Install,若要使用 TypeScript,因為安裝 Astro 時就已經預設支援,我們只需要加上以下這段 Snippet 到 tsconfig.json 即可,用以指定 Astro 官方建議的 TypeScript 基本設定。
{
  "extends": "astro/tsconfigs/base"
}
而我平常使用 React 來做前端開發,因此參考 @astro-react,透過 npm install @astrojs/react react react-dom && npm install -D @types/react @types/react-dom 來安裝這些 dependencies。
接著再新增 astro.config.cjs,裡面貼上
import { defineConfig } from 'astro/config';
import react from '@astrojs/react';

export default defineConfig({ integrations: [react()] });
為了測試 React 的 Component 是否能執行,我們可以在 src/ 下新增 components/Counter.tsx
import { useState } from 'react';

export default function Counter() {
  const [count, setCount] = useState<number>(0);
  return (
    <div>
      <p>Count: {count}</p>
      <button onClick={() => setCount(count + 1)}>Increment</button>
      <button onClick={() => setCount(count - 1)}>Decrement</button>
    </div>
  );
}
並且修改 index.astro,加上
---
import Counter from '../components/Counter';
---

<h1>Hello, World</h1>
<Counter client:load />
測試點擊 Increment / Decrement 來驗證 Count 是否有變化。
需要注意的是,Astro 預設會將所有 UI component 轉換成 HTML 及 CSS,將 Client-side JavaScript 盡可能移除,藉以使得載入渲染速度更快。
而當我們要加入能夠互動的 React Component 時,需要加上 client:load directive 來將這個 Component 打包成 Client Island,這個獨立出來的 Island 才能包含互動的行為。
加入 Tailwind
Tailwind 是所謂 Utility-first 的 CSS Framework,白話一點來說就是工具導向的框架,讓我們能在 HTML 中使用許多預先定義好的 Classes,例如 <button class="bg-blue-500 text-white px-4 rounded">Click</button> 這樣的寫法。
參照 Astro - Styling and CSS #Tailwind、Tailwindcss - Install Tailwind CSS with Astro,我們可以簡單的透過 npx astro add tailwind 在 Astro >= 5.2.0 的版本安裝 >= 4.0.0 的 Tailwind。
執行完畢這個指令,我們可以發現在 package.json 中多了 @tailwindcss/vite 及 tailwindcss 兩個套件,並且在 astro.config.cjs 中幫我們引入 tailwindcss。
import { defineConfig } from 'astro/config';
import react from '@astrojs/react';
import tailwindcss from '@tailwindcss/vite'; // Added

export default defineConfig({
  integrations: [react()],
  vite: { plugins: [tailwindcss()] }, // Added
});
也一併新增了 styles/global.css,裡面包含一行程式碼 @import "tailwindcss";。
根據官方文件,通常會建議在 Layout 的檔案中引用(如 src/layouts/Layout.astro),這樣子只要有用到這個 Layout 的 Page 就能使用 Tailwind 的功能。
我們先在 index.astro 簡單測試
---
import '../styles/global.css';
---

<h1>Hello, World</h1>
<button class="bg-blue-500 text-white px-4 rounded">Click</button>
理論上就能看到藍色圓角的按鈕了。