Astro 架站筆記(二):Astro Components 及 Layouts,用 Markdown 寫文章
由於要架設一個部落格,核心是以內容為本,我們需要專注在內容的撰寫之上。如果在寫文章的同時還要重新寫一整段 HTML、調整部分內容的 CSS,就算是把舊的複製貼上,一樣會很沒有效率。
因此,Astro 理所當然的有提供稱作 Astro Components 及 Astro Layouts 的基礎元件,讓我們做完版面的定義後,就可以專心在內容的產出了。
今天便來聊聊如何用 Markdown 來撰寫文章,並套用自定義的 Layout 來渲染文章內容。
Astro Components
提到 Layouts 之前,我們得先知道什麼是 Astro Components,這是一種副檔名為 .astro,能讓我們撰寫能夠重複利用的 UI Block。
每個 Component 包含 Frontmatter(也就是 --- 所包覆的區塊)及後續的 HTML 內容。
Astro Components 行為很像 React 的 Functional Components,都可以定義從外部傳入的參數,這在 Astro 中稱作 Component Props。
例如在 src/components 底下建立一個稱作 Greeting.astro 的 Astro Component:
---
type Props = { name: string };
const { name } = Astro.props;
---

<p>Hello {name}</p>
定義了可傳入的 Prop 變數 name,而這個 Component 則很簡單的顯示 Hello 加上傳入的變數。
在其他頁面如果要使用這個 Component,就只需要引入、傳入參數:
在 index.astro 中加入
---
import Greeting from '../components/Greeting.astro';
---
以及
<Greeting name="John" />就能夠印出 Hello John 的文字在瀏覽器中,是不是和 React 非常像?畢竟 Astro 的模板也是受到 JSX 的格式所啟發的。
Astro Layouts
而根據官方文件,Astro Layouts 是一種特殊的 Astro Components,特別為了定義頁面的結構,例如一個 Page 的模板。基本的 Astro Layouts 通常包含完整的 HTML 頁面元素如 <html>、<head>、<body> 等等標籤。
當撰寫完 Layout 後,可以讓 .astro、.md 等頁面檔案使用,這些頁面中的子內容就會被插入在 Layout 當中有寫 <slot /> 的部分。
例如我們定義一個文章的模板在 src/layouts/BlogPostLayout.astro:
---
const { frontmatter } = Astro.props;
---

<html>
  <head>
    <meta charset="UTF-8" />
    <title>{frontmatter.title}</title>
  </head>
  <body>
    <article>
      <h1>{frontmatter.title}</h1>
      <p>發佈時間:{frontmatter.publishedTime}</p>
      <p>最後更新:{frontmatter.updatedTime}</p>
      <slot />
    </article>
  </body>
</html>
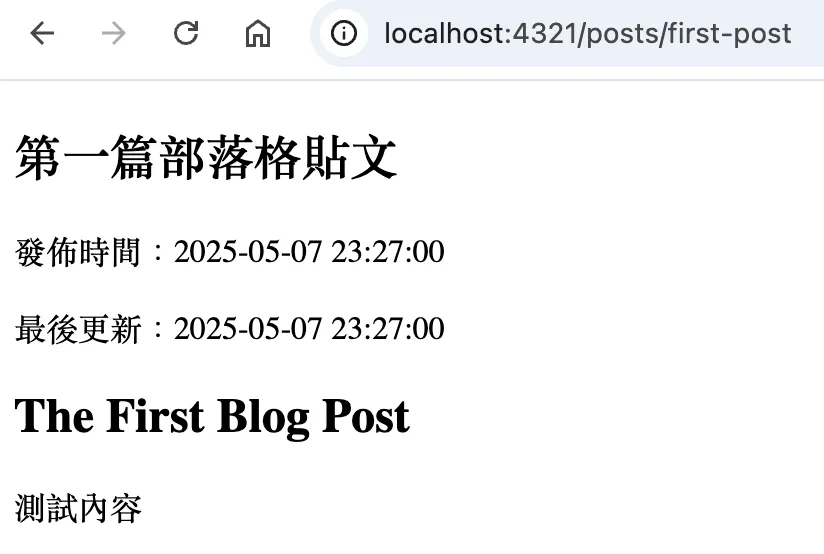
便可以套用此模板來撰寫一個 .md 的文章(src/pages/posts/first-post.md):
---
layout: ../../layouts/BlogPostLayout.astro // Use the layout
title: '第一篇部落格貼文'
publishedTime: '2025-05-07 23:27:00'
updatedTime: '2025-05-07 23:27:00'
---

# The First Blog Post

測試內容
產出的結果如下:
一般來說部落格的文章用 Markdown 寫其實就相當足夠了,但若是想使用 .astro 的格式來更彈性的插入一些元素,也可以這麼做。
新增 src/pages/posts/second-post.astro):
---
import BlogPostLayout from '../../layouts/BlogPostLayout.astro';
const frontmatter = {
  title: '第二篇部落格貼文',
  publishedTime: '2025-05-07 23:27:00',
  updatedTime: '2025-05-07 23:27:00',
};
---

<BlogPostLayout frontmatter={frontmatter}>
  <h1>第二篇貼文</h1>
  <p>測試內容</p>
</BlogPostLayout>
如此一來,就能在原生的 .astro 檔案中也套用 Layout。
MDX
倘若我們想要保有彈性,但又不想用「類 HTML」的 Tag 語法(也就是 .astro)來撰寫文章,有沒有其他方式?
那就可以試試看 MDX,在保有基本 Markdown 的架構底下,同時也能插入 JSX 的語法。在使用之前,我們一樣需要安裝 Astro 的 MDX 套件。
$ npm install @astrojs/mdx並且在 astro.config.mjs 中加入以下內容:
import { defineConfig } from 'astro/config';
import react from '@astrojs/react';
import tailwindcss from '@tailwindcss/vite';
import mdx from '@astrojs/mdx'; // Added

export default defineConfig({
  integrations: [react(), mdx()],, // Updated
  vite: { plugins: [tailwindcss()] },
});
如此一來就可以開始撰寫 MDX 的文章了。新增 src/pages/posts/third-post.mdx 的檔案。
還記得我們剛剛建立過稱作 Greeting 的 Astro Component 對吧?這樣的 Component 便能直接整合進 MDX 的文章中:
---
layout: ../../layouts/BlogPostLayout.astro
title: '第三篇部落格貼文'
publishedTime: '2025-05-08 23:12:00'
updatedTime: '2025-05-08 23:12:00'
---

import Greeting from '../../components/Greeting.astro';

# The Third Blog Post

<Greeting name="John" />
一樣可以套用 BlogPostLayout,並且在 Markdown 的 Frontmatter 外引入我們已經建立好的 Component,就可以絲滑的使用 JSX 的方式插入在文章中!